Friday 29 March 2013
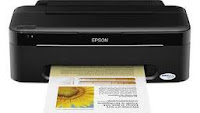
Samsung ML 2165W Manual
* Processor (MHz): 300MHz
* Memory: 32MB
* OS Compatibility: Windows 7 /Vista/XP/2008/2003/2000, Various Linux, Unix, Mac 10.4 and up
* Interface: Hi-Speed USB 2.0, Wireless 802.11 b/g/n
* Noise Level: Less than 50 dBA printing, Less than 26 dBA standby
* Duty Cycle, Monthly (Pages): 10,000 pages
* Print Speed (Black & White): Up to 21 ppm in Letter
* Print Resolution: Up to 1200 x 1200 dpi effective output
* Duplex Printing: Manual
* Emulation: Samsung Printer Language (SPL)
* Input Capacity Paper Handling (Standard Cassette Tray): 150 Sheets
* Output Capacity: 100 Sheets
* Media Size: 3″ x 5″ – 8.5″ x 14″
* LCD: LED (Toner/Status)
* Power Consumption: Less than 1.2 W (standby mode), Less than 30 W (ready), Less than 310 W (Peak)
* Product Dimensions: 13.0″ x 7.0″ x 8.5″ (W x D x H)
* Product Weight: 8.8 lbs.
* Cartridge Type: 1-Piece Toner
* Cartridge Yield (Black): 1,500 Pages
* Black Toner Model Code: MLT-D101S
Before using this Samsung ML-2165W, you have to check the accessories supplied, such as power cord, software CD, handset, misc. accessories and quick installation guide.
Download Samsung ML-2165W Manual
Thursday 28 March 2013
HP PhotoSmart 6510 Manual User Guide
workmanship the one as a whole very light to use. Connectivity falls a bit brief: You’ll light upon only SD and Remembrance Rod card slots behind a forehead array, and the instrument of force has no USB/PictBridge harbor--an unwonted oversight. The MFP does hold up USB and Wi-Fi, though, and the ceremony of induction order is compact. HP PhotoSmart 6510 Manual User Guide
Dell Inspiron 2600 service guide
troubleshooting and instruction owner manual reference used for
maintaining, disassembly, removal, replacement, install and
servicing the Dell Inspiron 2600. It provides comprehensive
information on identifyin features, components, and spare parts
troubleshooting problems and performing assembly and disassembly
procedures.
Table contents of Dell Inspiron 2600 service manual A Tour
of Your Computer Solving Problems Reinstalling Drivers and Utilities
Reinstalling Microsoft® Windows® Operating Systems System Setup Program
Power Management Using the Dell Diagnostics Specifications Pin
Assignments for I/O Connectors Removing and Replacing Parts
Documentation. Download Dell Inspiron 2600 Service Manual here
Wednesday 27 March 2013
HP Officejet 5600 User Guide
Manual contains the information you need when installing, setup,
setting, configuring, maintenance and troubleshooting, operating
instructions the HP Officejet 5600.
Table contents of HP Officejet 5600 Manual
HP All-in-One overview
The HP All-in-One at a glance ~ Control panel features ~ Menu overview ~ Text and symbols ~ Use the HP Image Zone software
get here HP Officejet 5600 User Manual
Monday 25 March 2013
HP Pavilion dm3 Manual
Table of contents HP Pavilion dm3 Manual
- Getting started
Using HP QuickWeb (select models only - Features
Identifying hardware ~ Components ~ Labels - Wireless and local area networks
Using wireless devices ~ Identifying wireless and network status icons ~ Using the wireless controls ~ Using the wireless button ~ Using Wireless Assistant software ~ Using HP Connection Manager (select models only) ~ Using operating system controls ~ Using a WLAN ~ Setting up a WLAN ~ Protecting your WLAN ~ Roaming to another network ~ Using HP Mobile Broadband (select models only) ~ Inserting a SIM ~ Removing a SIM ~ Using Bluetooth wireless devices ~ Bluetooth and Internet Connection Sharing (ICS) ~ Troubleshooting wireless connection problems ~ Cannot connect to a WLAN ~ Cannot connect to a preferred WLAN network ~ Network icon for WLAN is not displayed ~ Current WLAN network security codes are unavailable ~ WLAN connection is very weak ~ Cannot connect to the wireless router ~ Connecting to a local area network (LAN) - Pointing devices and keyboard
Using pointing devices ~ Setting pointing device preferences ~ Using the TouchPad ~ Two-finger scrolling ~ Rotating (select models only) ~ Pinching (select models only) ~ Using the action keys ~ Using the hotkeys ~ Using keypads ~ Using the embedded numeric keypad ~ Enabling and disabling the embedded numeric keypad ~ Switching key functions on the embedded numeric keypad ~ Using an optional external numeric keypad ~ Cleaning the TouchPad and keyboard - Multimedia
Multimedia features ~ Adjusting the volume ~ Using the media activity keys ~ Multimedia software ~ Using HP MediaSmart software ~ Using multimedia software ~ Installing multimedia software from a disc ~ Audio ~ Connecting external audio devices ~ Checking your audio functions ~ Video ~ Connecting an external monitor or projector ~ Connecting an HDMI device ~ Configuring audio for HDMI (select models only) ~ Webcam ~ Webcam tips ~ Adjusting webcam properties - Power management
Setting power devices ~ Using power-saving states ~ Initiating and exiting Sleep ~ Initiating and exiting Hibernation ~ Using the battery meter ~ Using power plans ~ Viewing the current power plan ~ Selecting a different power plan ~ Customizing power plans ~ Setting password protection on wakeup ~ Using external AC power ~ Connecting AC power ~ Testing an AC adapter ~ Using battery power ~ Finding battery information in ~ Using Battery Check ~ Displaying the remaining battery charge ~ Inserting or removing the battery ~ Charging a battery ~ Maximizing battery discharge time ~ Managing low battery levels ~ Identifying low battery levels ~ Resolving a low battery level ~ Resolving a low battery level when external power is available ~ Resolving a low battery level when a charged battery is available ~ Resolving a low battery level when no power source is available ~ Resolving a low battery level when the computer cannot exit Hibernation ~ Calibrating a battery ~ Step 1: Fully charge the battery ~ Step 2: Disable Hibernation and Sleep ~ Step 3: Discharge the battery ~ Step 4: Fully recharge the battery ~ Step 5: Reenable Hibernation and Sleep ~ Conserving battery power ~ Storing a battery ~ Disposing of a used battery ~ Replacing the battery ~ Shutting down the computer - Memory modules
- Drives and external devices
Drives ~ Identifying installed drives ~ Handling drives ~ Improving hard drive performance ~ Using Disk Defragmenter ~ Using Disk Cleanup ~ Replacing the hard drive in the hard drive bay ~ Using HP ProtectSmart Hard Drive Protection (select models only) ~ Identifying HP ProtectSmart Hard Drive Protection status ~ Managing power with a parked hard drive ~ Using HP ProtectSmart Hard Drive Protection software ~ Using external drives ~ Connecting optional external drives ~ Sharing optical drives ~ External devices ~ Using a USB device ~ Connecting a USB device ~ Removing a USB device ~ Using Digital Media Slot cards ~ Inserting a digital card ~ Removing a digital card - Security
Protecting the computer ~ Using passwords ~ Setting passwords in Windows ~ Setting passwords in Setup Utility ~ Administrator password ~ Managing an administrator password ~ Entering an administrator password ~ Power-on password ~ Managing a power-on password ~ Entering a power-on password ~ Using antivirus software ~ Using firewall software ~ Installing critical security updates ~ Installing an optional security cable - Changing QuickWeb settings
- Appendix A Setup Utility (BIOS)
Starting Setup Utility ~ Using Setup Utility ~ Setup Utility menus ~ Updating the BIOS ~ Updating programs and drivers - Appendix B Backup and recovery
Creating recovery discs ~ Backing up your information ~ Using Windows Backup and Restore ~ Using system restore points ~ When to create restore points ~ Create a system restore point ~ Restore to a previous date and time ~ Performing a recovery ~ Recovering using the recovery discs ~ Recovering using the dedicated recovery partition
Saturday 23 March 2013
Wednesday 20 March 2013
How to reset your Epson cartridges spoof
Resetter Printer Epson CX7300

1. Switch on printer
2. Download Adjustment program Epson
2. Open auto.bat to set the date to 17 January 2006
3. Run adjprog.exe
4. Click accept
5. Click particular adjustment mode
6. Go to maintenance then Select waste ink pad counter then click ok
7. Click on "check button till its done then click on initialization button
then click on finish button
8. Switch off printer for 5 secs then switch on again
9. After you reset succesfully, you can change the date back to normal
Tuesday 19 March 2013
Epson Stylus Pro 7900 Printer
Epson technology is renowned for delivering fast, efficient printing. The Epson Stylus Pro 7700 and 9700 are designed to produce faster output without compromising print quality, by using advanced compression and decompression technologies that speed up data during printing. The printers feature the latest Epson MicroPiezo TFP print head, which is optimised to work with a five colour ink set, a subset of Epson UltraChrome HDR Ink incorporating cyan, vivid magenta, yellow, photo black and matte black. The print head delivers perfectly accurate dots with virtually no misting or satellites. Perfect smoothness and detail is down to Epson Variable-Size Droplet technology (VSDT), which can produce droplets as small as 3.5 picolitres.
The Epson Stylus Pro 7700 and 9700 produce prints with even more impact thanks to the Vivid Magenta Technology. Vivid Magenta gives a wider colour gamut, which in turn provides enhanced colour accuracy. This is particularly noticeable for blues, magentas, reds and oranges, giving prints a more natural and life-like appearance. The ink set also includes both Matte and Photo black inks, which maximises quality on any given media. The printer automatically selects the optimum black ink to match the media, which adds convenience and productivity to the printing process and reduces cost.
Prints from the Epson Stylus Pro 7700 and 9700 are highly light-fast and will retain their colour and quality for longer, wherever they are used. The specifically formatted pigment inks are water-resistant and have excellent colour stability, for long-lasting prints which are dry and stable very shortly after emerging from the printer.
There is a range of features of the Epson Stylus Pro 7700 and 9700 which makes the printing process as easy and as flexible as possible. Fast network connection, clear control and straightforward operation and maintenance are built in. The high-visibility 320x200 pixel control panel screen shows all aspects of the printer from ink levels and quick cleaning to paper cutting and job cancellation. Barcode printing is a way to keep track of media during changes and can eliminate misprints due to lack of media. The new spindle-less flange system makes changing roll paper easier and takes up less space. It handles a wide variety media types, sizes and tensions and the new rotary paper cutter is more durable, cuts smoothly and cleanly in seconds, so there is no need for manual cutting.
Intelligent software helps users get the most out of the Epson Stylus Pro 7700 and 9700 by keeping track of all aspects of printing, streamlining the workflow and enhancing creativity. The new intuitive printer driver is easy to use and can be customised for different levels of information and print and media settings. These printers include the drivers to support the AutoCad HDI interface for high speed and precision accuracy.
Epson’s Layout Manager, a new function within the printer driver, enables the easy importation and layout of data created in various applications. Functions such as Move, Enlarge/Reduce, Rotate and Fit-to-Roll simplify workflow and reduce waste.
Epson Stylus Pro 7700 and 9700 key features summary:
· Advanced 10-channel Epson MicroPiezo™ print head
· 5-colour Epson UltraChrome HDR (subset) ink technology with Vivid Magenta Technology – Cyan, Vivid Magenta, Yellow, Matte Black and Photo Black
· 1440x1440 dpi resolution with Epson Variable-sized Droplet technology
· Handles roll or cut sheet media up to 24” for SP7700 and 44” for SP9700 and 1.5mm thick
· New flange roll holder for fast and easy media changeover
· 2.5” colour LCD control panel with white backlight
Monday 18 March 2013
Code Error canon MP145, MP150, MP160
E3-3 = Paper jam
E4 = no tinta/cartridge
E5-5 = ink cartridges are not installed or installed incorrectly cartirdge (not-compatible)
E8 = absorber full, or platen waste ink absorber full mita direset
E9 = connection to a digital camera / video camera does not support
E14 = Ink cartridges Whose destination are wron
gE15 = Catridge having run outE16 colors - black Catridge had run out
E17-E19 = problems on the scan head alignment sheet
E22 = Carriage error
E23 = Paper feed error
E24 = Purge unit error (the cleaning head)
E25 = ASF (cam) sensor error
E26 = Internal temperature rise error
E27 = ink absorber full or platen waste ink absorber full> reset with toolsnya
E28 = Ink cartridge temperature rise error
E29 =-EEPROM errorE33 = Paper feed position error
E35 15 = USB Host VBUD Overcurrent error - USB
E37 17 = motor driver normalE40 no other hardware error
E42 20 = 22 = Scanner error
Sunday 10 March 2013
changing pick-up roller CLP-300
1. turn off and remove power cable
2. remove paper drawer
3.
remove imaging unit: I don't think this is necessary, what I would
remove is the toner waste cartridge (open the front panel, and pull out
the L-shaped object on the left side), because you don't want toner
spilling all over the place.
4. turn the printer upside down. for these instructions, have the front of the printer face you.
B) ACCESSING THE ROLLER
5.
Look at the axle where the pick-up roller is attached to. There are two
white plastic things at the ends. The left end has a tiny plastic tab
protruding along the axis of the axle. It's basically L-shaped, and the
axle has a small hole where the L sits inside.
- So use a small flat
screwdriver to gently pry up this tab. I would slide a stuff piece of
paper (manilla folder or business card) underneath so you are not
over-flexing and snapping this tab. After you have the piece of paper
all the way through, just leave it there.
6. Slide the locker
towards the center (to the right). It will slide about 0.5 inches; don't
force it too much. The purpose of this maneuver is it will allow you to
rotate the entire axle in order to gain full access to the roller.
7.
Rotating the axle: this will require a little bit of playing around,
but should not require excessive force. I found it most effective to
rotate so the *top* is rotating towards you and not away from you. Just
jiggle the axle around; I held it at the central rubber thing and shook
it around to rotate it.
8. The rubber belt is attached to a plastic
shell. The plastic shell is attached to another plastic shell around the
axle. You'll find two flexible tabs that lock the plastic shells
together. You want to have this positioned towards the bottom because
you need room to access the entire rubber belt.
9. The other side of
the rubber belt (opposite the tabs) is somewhat locked into the plastic
shell, so you have to use some force to lift it away. After that,
everything should be free.
10. Washed with water, dried it out. You
don't want to turn the belt inside out. What I did was remove the belt,
and since it was a symmetrical shape, I just flipped it over, so the old
surface is switching places with a new surface.
11. Push the plastic
shell back in with the small protrusions first, then you can push the
entire thing to have it lock into the plastic tabs. Now you will rotate
the axle away from you (which should be easier), and position everything
like at the beginning. Remove the piece of paper at the plastic tab,
and then hold onto the axle and push the left plastic locker to its old
position. Replace the toner waste cartridge and test everything out.
Saturday 9 March 2013
Digital Photos Printing Tips

Writing digital photos at base is an option that has its advantages and disadvantages. For a play it is the most favourable root and the most quick one too as the ikon prints are prompt a rattling momentaneous dimension after hitting the Indicant button. But publication numerous digital photos at abode can cost a key become of money and can end up state pretty pricy. Using a spot wellborn digital pic machine joint with exalted level exposure wadding is not upper cost tag printing photos at domicile hits a propertied glasswork ceiling. Digital photos printed at lodging are not as favorable as digital photos printed on overpriced advertising pic machine devices.
Printing digital photos at plate is a vantage action for occasional prints or for digital prints to distribute with friends and house. The lavatory of printing digital photos at domicile is cured worth the not as perfect calibre and the soprano tag. But if you poorness to produce a monumental limit of digital photos and also looking for gear property sending the photos to a ikon printing is adjusting colours. In elongate line it is real solid to variable between the colors seen on the LCD obstruct when previewing the digital photos and the flag printed on the photo indication essay. There are more reasons for that the nucleus supplying is that digital photos accumulation colouring collection in a diverse arrange that of how exposure publication interact touch. Avouchment icon printers drop a epochal
colourise from digital photo files to printing information. When publication at interior nonetheless that extend cannot be done as fit as it is finished professionally. For that reasonableness digital photos printed at lodging are usually of lesser caliber when it comes to flag.
Report is an significant ingredient of digital picture prints. Choosing the turn icon exposure cover for a picture printer is pivotal for achieving sopranino degree prints. Apiece photo machine can use some types of icon theme. Disparate ikon writing motley in coefficient, broadness, whiteness and of direction terms. To get the champion picture prints the penalize and maximal possible attribute pic essay should be misused. Grownup writing services unremarkably live which icon paper photo theme. When publication at place it is harder to jazz and to buy the penalize cover which results in lower degree prints.
Location publication is a nice prize for unprofessional photographers virtuous sensing to get their photos get on wadding or hunt to use digital pic prints in visit to deal a instant with friends and household. Printing at residence is a dandy solution when in penury to publish a midget enumerate of photos symbol of ikon prints and when search for higher property using a digital exposure writing writer is a exceed option.
Wednesday 6 March 2013
take care Canon Printer Ink tank
S 200 SPX, canon i 320, pixma IP 1000 or i6100 printer canon A3 and the
like? In the history of canon printer, serial printer uses cartridges
with printhead models and inktank separately. Some users prefer to use a
model like this cartridge model. Problems that often happens is that it
printhead total dead end and are required to purchase new cartidge.
Why?
There are 3 reasons why cases like the above.
- Foam on the tank was saturated ink that will not absorb ink
refill. This means that if forced direfill, ink flows like water flowing
in a solid. Certainly very little that can be stored into the foam
inktank. The result is predictable, ink tanks and the lack of printing
ink was not optimal, or would not print at all. - Foam surface was crusty ink tank or often due to long use. Despite
direfill, transport of ink from the printhead inktank cork hindered by
this scale. - Position shifts foam than necessary, so that transportation of ink broken / or not well.
less maximum print is by soaking a few minutes the printer printhead
cleaner and replace the liquid ink tanks with new ones. Guaranteed
results returned to normal print.
resetting epson lx 300 printer to default setings
Turn Off Printer
Hold LL/FF , Load/Eject and Pause Buttons then turn on printer
Tuesday 5 March 2013
Error Code 09,037.45 Xerox Phaser 8560
That's a ink loader error, due to the 8200 ink stick; to fix it
- Power down the printer.
- Hold the back button and the info button at the same time, without letting go, power up the printer.
- Keep holding down the buttons until the
XEROX logo comes fully to the center of the screen, keep holding for 2
more seconds, then let go. I'll take about a minute or two for the
Diagnostic screen to come up, the display will turn blank and black. - When the Diagnostic screen comes up go to down to the Function or
Exercise option, there will be an option that says "clear ISC faults"
it'll ask you to press OK to confirm, after you do then you will exit
Diagnostics and the printer will reboot. - It should be fine until it happens again. Until all the 8200 ink is
gone you will probably be doing this a few more times. Also make sure
the 8200 ink is not jammed inside the ink loader, if it is then you have
to un-jam it some how.
Monday 4 March 2013
Epson R220 R230 Software Resetter
Adjustment program for Epson R220 and R230 available here.
Download AdjustmentProgram for Epson R220/R230
Friday 1 March 2013
Encapsulated PostScript Printer Languages
It can contain any combination of text, graphics, and images. An EPS file is the same as any other PostScript language page description, with some restrictions.
An EPS file must be a conforming file, that is, it must conform to the Adobe Document Structuring Conventions (DSC). At a minimum, it must include a header comment,%!PS-Adobe-3.0 EPSF-3.0, and a bounding box comment,%%BoundingBox: llx lly urx ury, that describes the bounds of the illustration. (The specification does not require the EPSF version, but many programs will reject a file that does not have it.)
The EPS file should make no environment-sensitive decisions (the importing application may be trying to attain some special effect, and the EPS program shouldnt mess this up), although it can use some device-dependent tricks to improve appearance such as a snap-to-pixel algorithm.
The EPS file must not use operators that initialize or permanently change the state of the machine in a manner that cannot be undone by the enclosing applications use of save and restore (eg. the operators starting with "init" like initgraphics). As a special case, the EPS program may use the showpage operator. The importing application is responsible for disabling the normal effects of showpage.
The EPS file can contain any combination of text, graphics, and images. An EPS file is the same as any other PostScript language page description, with some restrictions.
There are three preview formats providing the preview option for different platforms:
• PICT (Apple Macintosh),
• TIFF (IBM compatible, especially Microsoft Windows),
• EPSI (platform independent).
PICT
PICT is a graphics file format introduced on the original Apple Macintosh computer as its standard metafile format. It allows the interchange of graphics (both bitmapped and vector), and some limited text support, between Mac applications, and was the native graphics format of QuickDraw. With the change to Mac OS X, PICT was dropped in favour of Portable Document Format (PDF) as the native metafile format, though PICT support is retained by many applications as it is so widely supported on the Mac.
TIFF
A widely used bitmapped graphics file format developed by Aldus and Microsoft that handles monochrome, gray scale, 8-and 24-bit color. TIFF allows for customization, and several versions have been created, which does not guarantee compatibility between all programs.TIFF files are compressed using several compression methods. LZW provides ratios of about 1.5:1 to 2:1. Ratios of 10:1 to 20:1 are possible for documents with lots of white space using ITU Group III and IV compression methods (fax).
Portable Document Format (PDF)
Portable document format, a universal computer file format that preserves all the fonts, formatting, colors, and graphics of any source document, regardless of the application and platform used to create it; the open de facto standard for electronic document distribution worldwide.
A PDF file delivers the single “digital master” for use in electronic, printed, and mixed workflow environments, ensuring a consistency across all media types. The Adobe PDF file format is ideally suited for technical publications, as it can include photographic images, diagrams, graphs etc. The PDF document can be widely distributed across many computer platforms. To read the PDF format, you require a copy of the Adobe acrobat reader, which can be obtained free of charge from the Internet or from many magazine publications on distributed CD–ROM.
The PDF combines three technologies:
1. A sub-set of the PostScript page description programming language, for generating the layout and graphics.
2. A font-embedding/replacement system to allow fonts to travel with the documents.
3. A structured storage system to bundle these elements and any associated content into a single file, with data compression where appropriate.
PostScript Printer Descriptions (PPDs)
PostScript Printer Description (PPD) files are created by vendors to describe the entire set of features and capabilities available for their PostScript printers. It is a small file that contains information about the characteristics of a certain PostScript printer. These informations are used by the PostScript printer driver to provide full access to the printer’s features